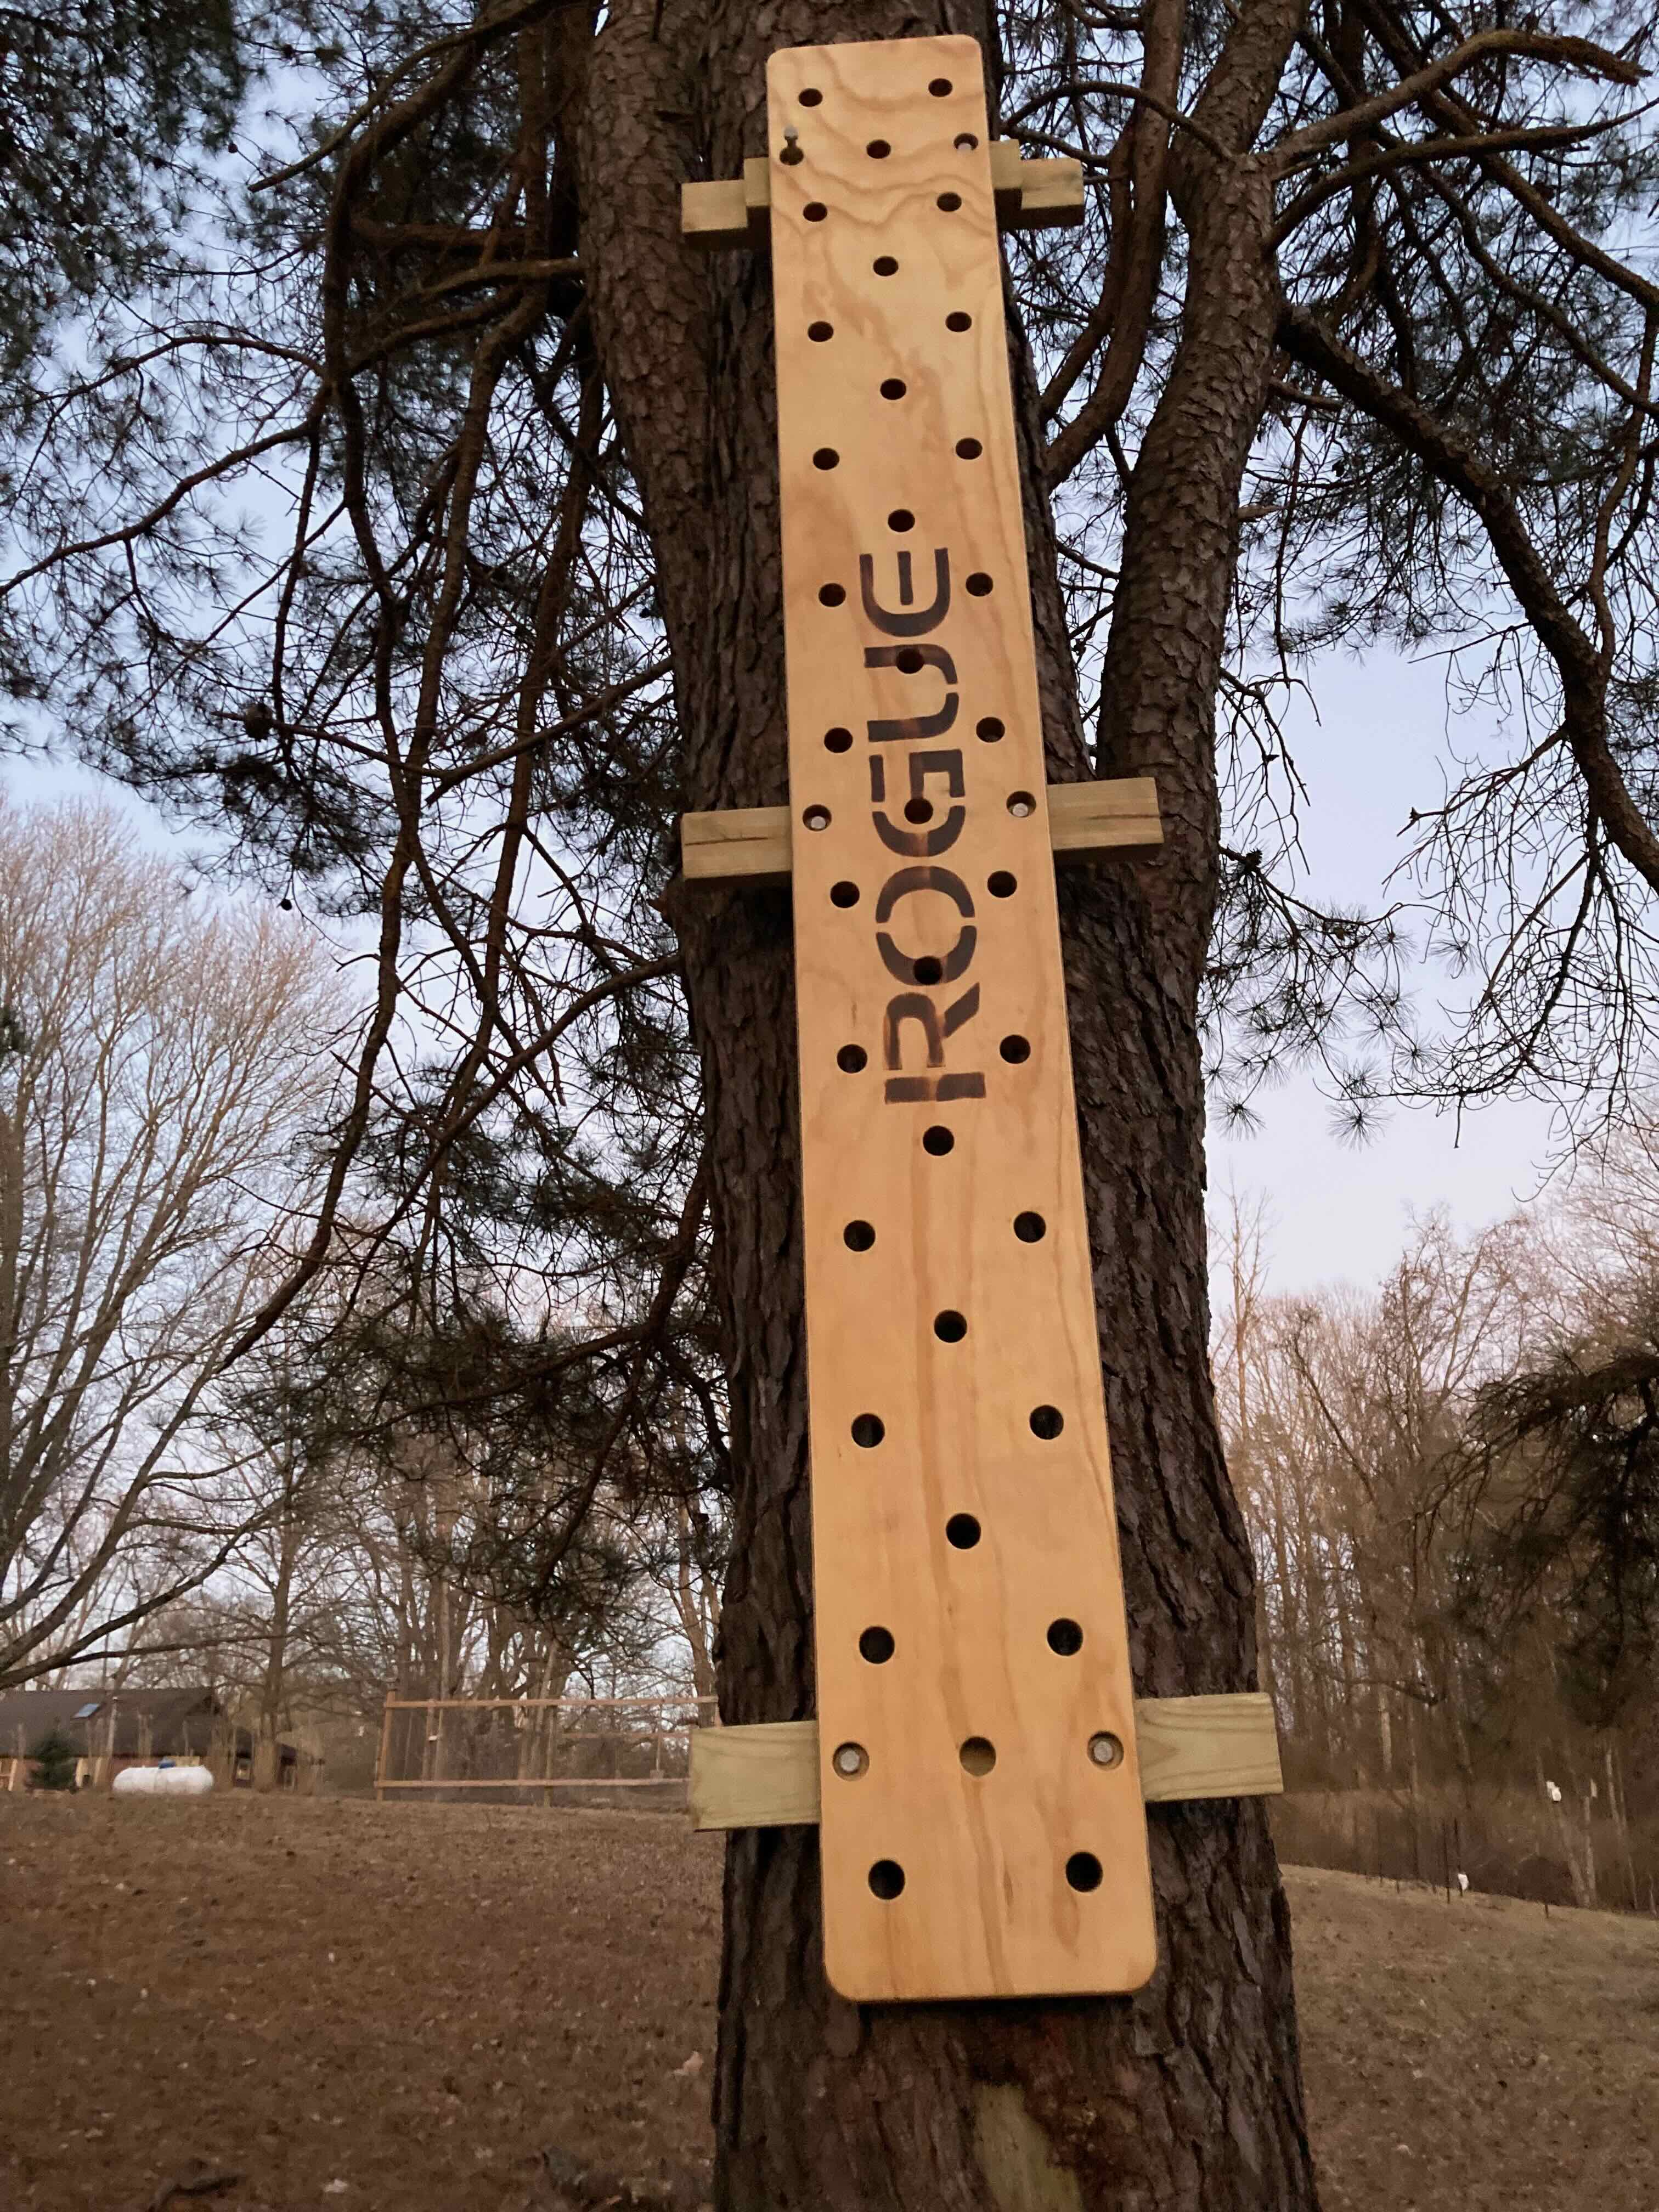
We mounted a Rogue Peg Board to a tree in our backyard in early March. It’s only been about a month and a half, but so far it’s held up well.
Rough materials list:
- 2 6-inch long, 1/2-inch diameter galvanized lag screws
- 3 8-inch long, 1/2-inch diameter galvanized lag screws
- 1 10-inch long, 1/2-inch diameter galvanized lag screws
- 1 Rogue Peg Board, unfinished
- Wood hardner
- Polyurethane
- Disposable brush
- 1 8 foot long 2x4
- Any saw you want for the 2x4
- Bungee chords
- Ladder
- Chorded drill
- Socket set
- 3/8-inch spade bit
- 1/2-inch spade bit
- Some wood screws
- Ladder
Approximate directions:
- Finish the Peg Board with polyurethane (and wood hardener, if desired)
- Cut the 2x4 into 3 pieces
- Mark and drill holes with the 1/2-inch spade into the 2x4 pieces spaced to match the peg board’s mounting holes
- Screw a level piece of scrap wood to your tree, just below where you want your peg board to start
- Set the peg board on top of the scrap wood, against the tree
- Tie the peg board to the tree with bungee chord
- Slide the 2x4 pieces between the peg board and the tree
- Align the 2x4 pieces’ holes with the peg board’s mounting holes
- Drill pilot holes into the tree
- Drill the lag screws into the tree, through the 2x4’s and peg board’s mounting holes
- Remove that piece of scrap wood at the bottom of the peg board and the bungee chord
Finish vs. Unfinished
We bought the cheapest version from Rogue, the PB-1 Echo Peg Board for $190 (before shipping and handling and taxes). This version comes unfinished. Purchasing a finished version would have cost $280.
I have no idea how nice the finish is on the more expensive model, but finishing the peg board myself was easy. I applied three coats of wood hardener and polyurethane — the polyurethane being the important piece. I have no idea if the wood hardener helped. Our thought was that if this was going outside, we should try to petrify it in a bath of chemicals. The polyurethane gave it a waxy, amber coat. I just followed the directions on the side of the bottle, including lightly sanding the board between coats and then wiping it down with a damp rag. I waited about a day between each coat because that’s what worked with my schedule, but the polyurethane bottle said to wait at least 4 hours.
What Didn’t Work to Mount the Peg Board
Mounting the peg board did not go according to plan, but what we ultimately did was simpler. We had planned to cut a 2x4 into 3 pieces, drill the 2x4 pieces to the tree with lag screws, then to drill holes through the 2x4 pieces set wider than the tree, and to attach the peg board to the 2x4 pieces by passing hex bolts through the peg board’s mounting holes that came pre-drilled into the peg board.
We envisioned that the peg board’s mounting hole would be clear enough away from the trunk of the tree to allow us to pass a hex bolt through it and tighten a nut on the back-end, but this wasn’t the case. Even if it had been, the threads on the hex bolts at the store didn’t run far enough along the bolt to ensure that the peg board could be fastened snugly against the 2x4. And I’m not sure how we thought we would prevent the nut from loosening.
What We Did
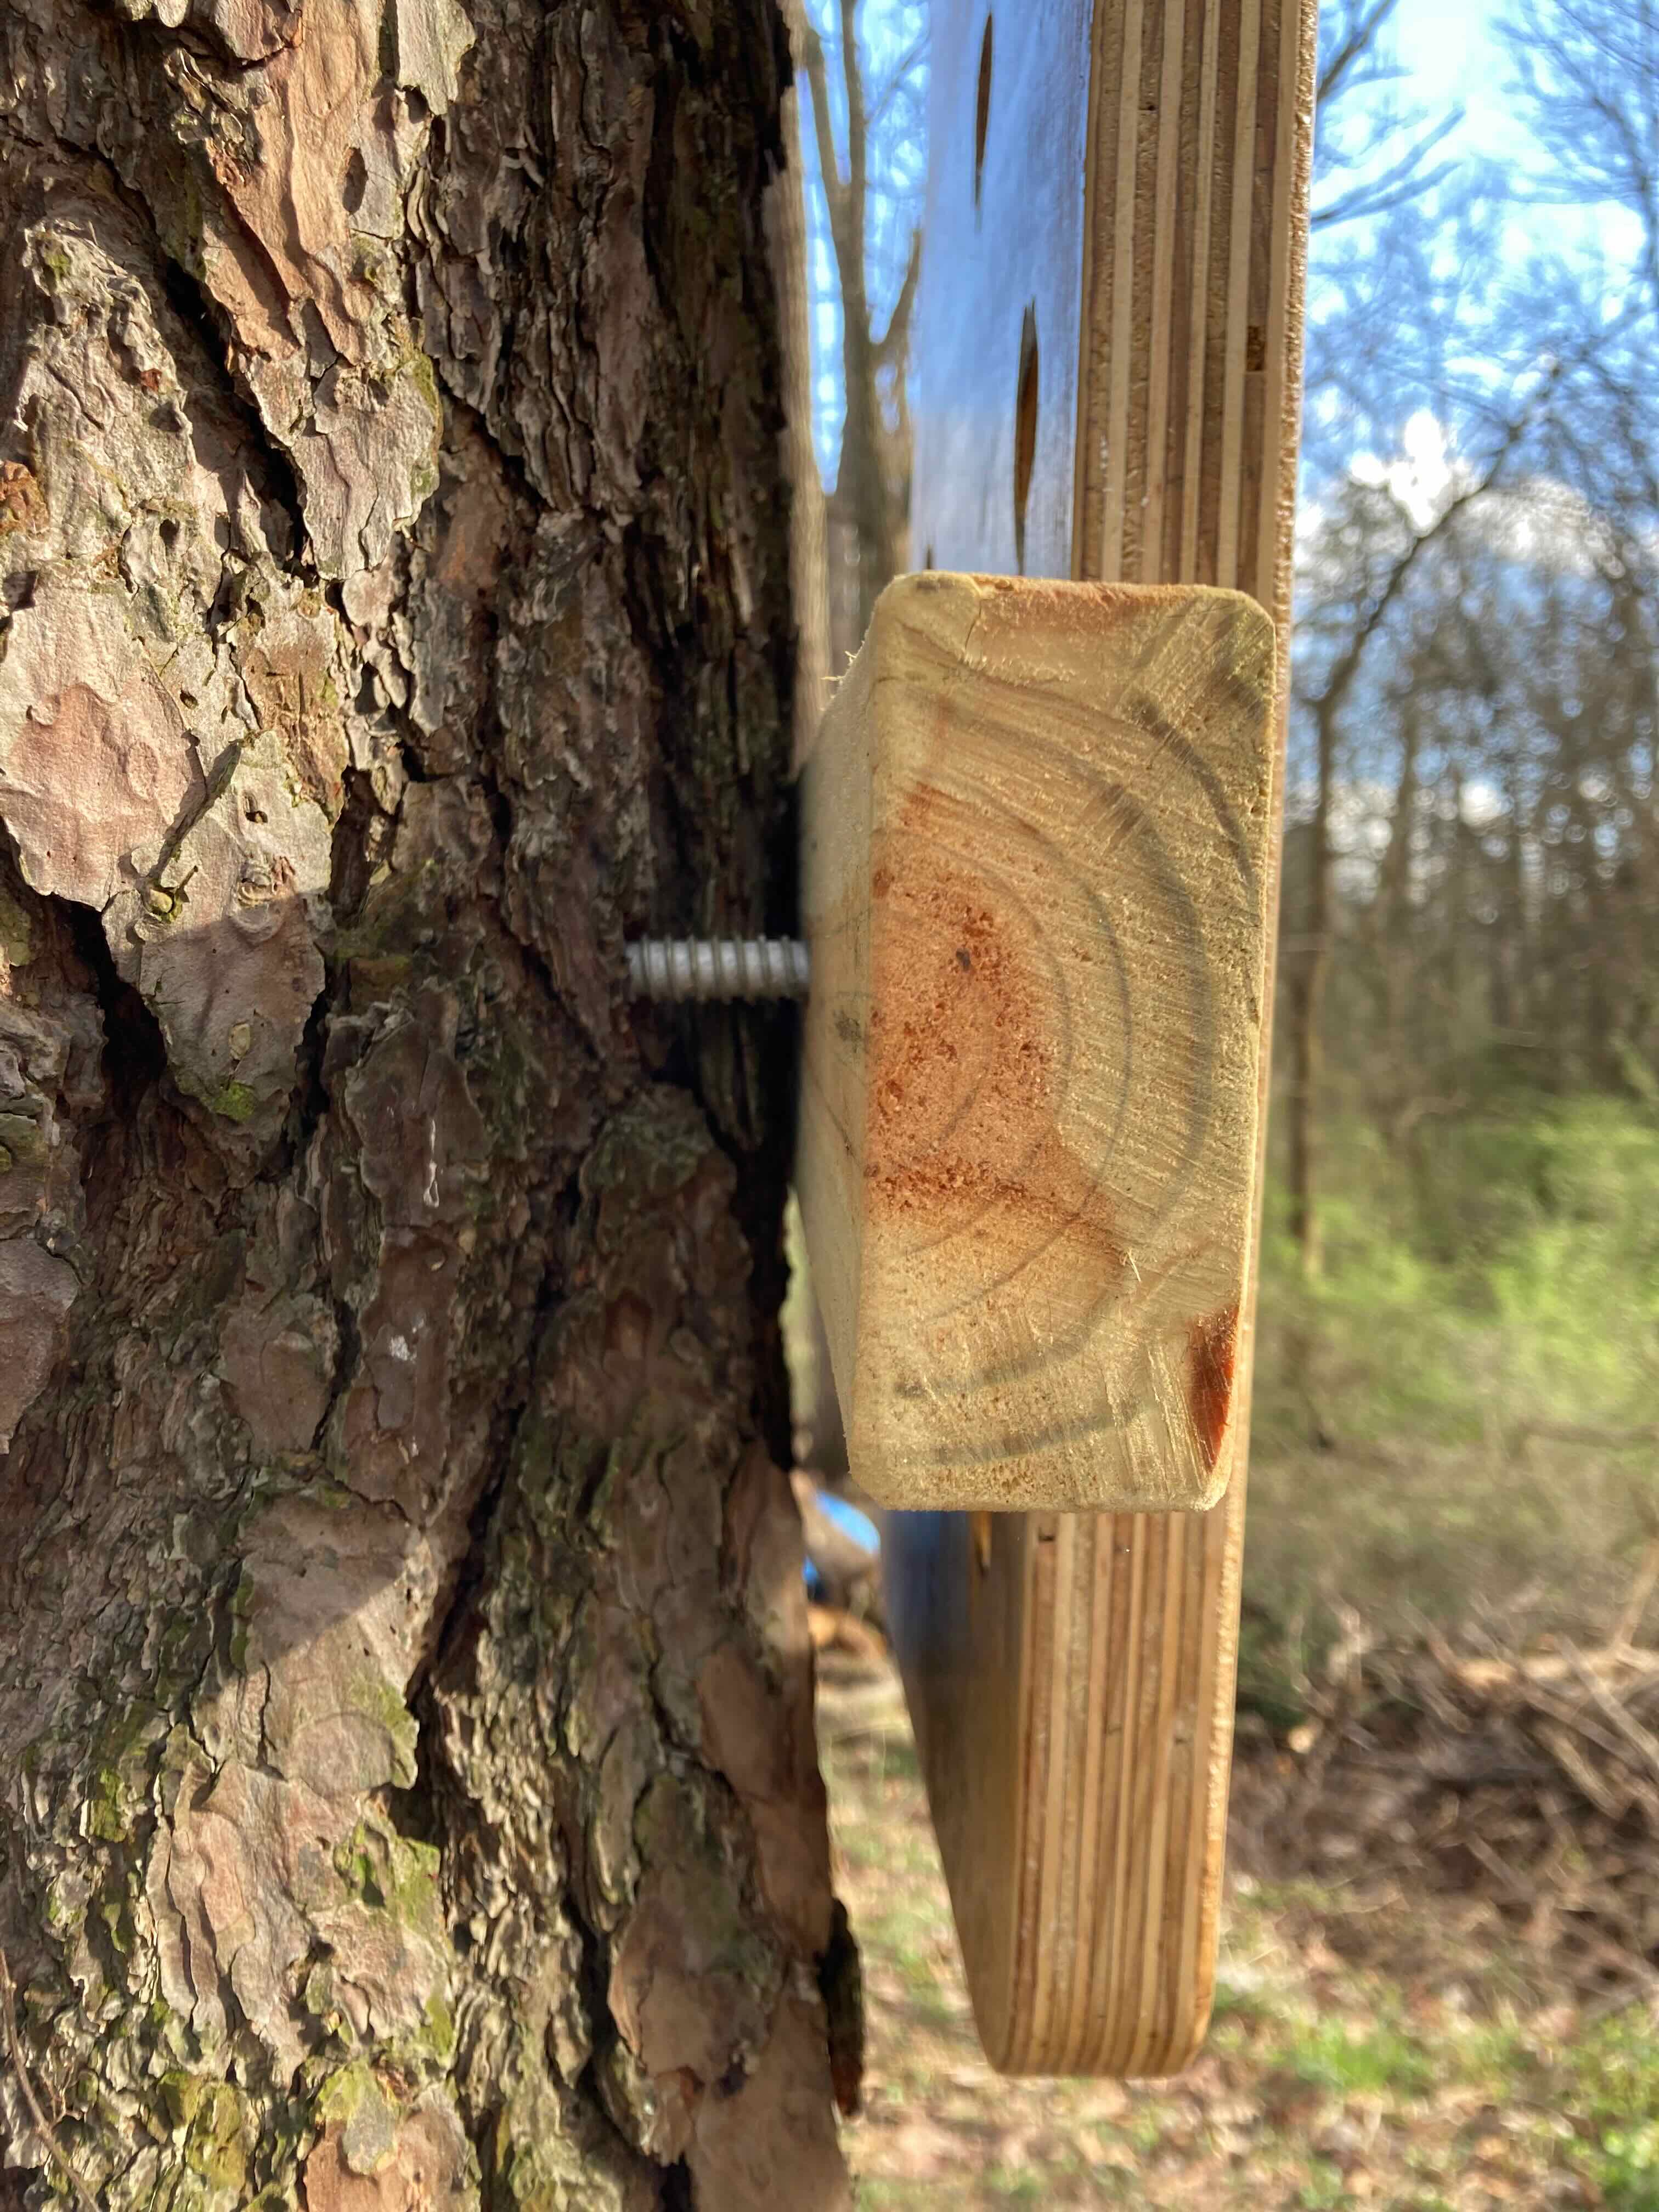
Instead, we threw 1/2-inch diameter galvanized lag screws through everything — through both the peg board’s mounting holes and the 2x4 pieces into the tree. First, we cut the 2x4 into 3 pieces, and drilled holes using a 1/2-inch spade. To ensure the 2x4 holes would later line up with the peg board’s mounting holes, I just set the 2x4 pieces underneath the peg board and traced the mounting hole with a pencil.
We weren’t really thinking of these as pilot holes. We were fine with the holes being big enough that we could slide the lag screw through to set it directly against the tree. The purpose of the 2x4 pieces was to keep the peg board a bit away from the tree to try to keep the peg board cleaner, and to try to help keep it level vertically. Our tree was some type of pine, and we throught this could keep sap off the peg board.
To mount the peg board to the tree, I took a piece of scrap wood (another 2x4 piece) and loosely screwed it into the tree. We used a level, because we later set the peg board on top of the scrap wood to hold it up while mounting it to the tree. To keep the peg board from tipping over, I tied bungee cord around the peg board and the tree. We then slipped the three 2x4 pieces behind the peg board, between it and the tree. We actually doubled-up on 2x4 pieces for the third set of mounting holes — using a fourth 2x4 piece. This was because the trunk started to curve away from the peg board.
For each 2x4 piece, after lining up the 2x4 holes with the peg board mounting holes, we pushed a lag screw loosely (with our fingers) through to keep the holes aligned while working elsewhere. One hole at a time, we’d try to drill a pilot hole into the tree. We used a 3/8-inch spade because an employee at Lowe’s told me I should drill a pilot hole a bit narrower than the screw so that the thread can still catch.
We ran into at least a couple problems, centered around the length of our spade relative to the size of our tree. The circumference of our tree was about 78 inches at the bottom of the peg board. Our tree wasn’t big enough to ensure that the 2x4 and mounting holes would always be flush against the tree. So, at times, our spade just wasn’t long enough to drill very far into the tree.
The next problem was that in some areas, we had trouble getting the spade back out of the tree. We were’t sure exactly why this was happening — maybe it had to do with the angle I was drilling and then reversing, but we wondered whether sap could be causing the blade to catch or something.
To actually drill the lag screws into the tree, we started by using a chorded drill. We ran a series of extension chords from our house to the tree. However, the chorded drill wasn’t capable of throwing all the screws fully into the tree, flush to the peg board. On the second or third screw, the drill started to lock-up in forward or reverse. I felt dread. It seemed like we weren’t going to be able to safely mount the peg board, and it seemed like the peg board was stuck to the tree as it was. However, my wife got a socket set out of her car, and to our surprise, we were actually able to crank the screws the rest of the way into the tree by hand, even though the chorded drill couldn’t do it. There was just one long screw at the top that we abandoned when it was only about half way in, but that hasn’t caused any problems.
Differing Lag Screw Lengths
The screw we couldn’t get flush probably got stuck because we were barely able to make a pilot hole for it. To the point above about the 2x4 pieces and mounting holes not being flush to the tree: as we went further up the tree, the distance was greater. This was partly because the tree was crooked, and partly because the trunk got skinnier. Thus, the trunk curved further and further away from our “perfectly straight” peg board before the lag screws made contact.
I had initially bought a total of 6 6-inch long, 1/2 inch diameter galvanized lag screws. I think I used 2 of them, and only on the lowest set of mounting holes. I think I used 8-inch long lag screws on the middle mounting holes and one of the top holes, and 1 10-inch long screw on the final hole (the one we couldn’t get in all the way).